Clone-A-Pussy Alternatives: DIY vs Kit — Safety, Realism, and Results
Clone-A-Pussy Alternatives: DIY vs Kit — What to Expect
Folks, the idea of creating an intimate mold is intriguing—personalized, permanent, deeply connected. But before you start mixing materials, understand this: safety, preparation, and realistic expectations matter far more than saving a few dollars on materials. The difference between a successful, safe experience and a frustrating (or worse, harmful) one often comes down to whether you choose a properly formulated kit or attempt DIY without understanding body-safe materials, working times, and proper technique.
This educational guide compares commercial intimate molding kits against DIY approaches—not to sell you either option, but to help you understand what each path actually requires, which materials are safe for skin contact, how to prepare properly, what realistic outcomes look like, and why consent and privacy considerations are non-negotiable. Whether you ultimately choose a kit, carefully research DIY methods, or decide intimate molding isn't for you, you'll have the information to make an educated decision. For comprehensive guidance on similar realistic pleasure products, see our complete masturbator rankings and realistic vs fantasy comparison guide.
⚕️ Educational Resource Notice: This content is for educational and informational purposes only and does not constitute medical, therapeutic, or professional health advice. The information provided is based on sexual wellness best practices and product knowledge, not medical expertise. Always consult qualified healthcare providers for personal health concerns, medical conditions, or questions about sexual health. Intimate molding involves skin contact with chemical compounds—perform patch tests, follow all safety protocols, and discontinue immediately if experiencing any adverse reactions.
Quick Answer: Kits bundle skin-safe molding and casting materials with measured ratios and clear steps, giving safer, more consistent results. DIY can be cheaper or more customizable but risks irritation, short working times, and poor cures. For intimate molds, do a patch test, follow time limits, and plan setup, support, and cleanup in advance.
What Are You Actually Making?
Understanding the two-stage process prevents confusion and sets realistic expectations.
Stage One: The Mold (Negative)
What it is: The mold is a hollow impression—the "negative" of the anatomy. Think of it like pressing your hand into clay: the indentation left behind is the mold. For intimate molding, you're creating a container (usually cylindrical) around the anatomy, filling it with molding material that sets to capture surface details.
Materials used: Typically skin-safe alginate (fast-setting, captures fine detail) or platinum-cure silicone (longer working time, reusable). The mold stage requires direct skin contact, so material safety is critical. For comprehensive material safety analysis, see our complete materials safety deep dive and TPE vs silicone comparison.
Single-use vs. reusable: Alginate molds shrink as they dry and are single-use. Silicone molds can be reused multiple times if stored properly.
Stage Two: The Cast (Positive)
What it is: The cast is the final positive replica created by pouring casting material into the mold. This is what you keep—the finished product that replicates the original anatomy.
Materials used: Plaster/gypsum (inexpensive, brittle, display-only), platinum-cure silicone (durable, flexible, body-safe for use), or specialty urethane resins (follow manufacturer guidance on body safety—some require full curing before skin contact).
Purpose determines material: Display-only casts can use plaster. Functional casts intended for use require body-safe silicone or other materials explicitly rated for skin contact.
Realism Factors
Detail capture: How well the mold captures surface texture—pores, fine lines, contours. Affected by material quality, mixing precision, and temperature control. For insights on realistic texture design, see our complete texture guide.
Dimensional accuracy: Shrinkage during curing (both mold and cast materials shrink slightly), expansion from heat, and compression from handling all affect final dimensions. Expect 2-5% variance from original. Understanding proper sizing is crucial—learn more in our comprehensive sizing guide.
Bubble management: Air trapped during mixing or pouring creates voids in the final cast. Proper technique minimizes but doesn't eliminate bubbles entirely.
Color matching: Achieving accurate skin tones requires skin-safe pigments and careful mixing. Lighting dramatically affects how color appears in photos versus reality.
Kits vs DIY — At-a-Glance Comparison
| Factor | Kit | DIY | What It Means |
|---|---|---|---|
| Safety (Skin-Safe Verification) | High (pre-vetted) | Varies (research required) | Irritation and reaction risk |
| Working Time Clarity | Clear, timed instructions | Unclear, brand-dependent | Risk of rushed errors |
| Realism/Accuracy | Consistent results | Great with skill, poor without | Learning curve steepness |
| Initial Cost | $40-80 all-inclusive | $20-40 materials, $40-60 tools | Hidden first-time expenses |
| Cleanup Complexity | Lower (pre-measured) | Higher (bulk mixing, waste) | Mess management planning |
| Support/Documentation | Step-by-step, customer service | YouTube, forums, trial/error | Confidence and troubleshooting |
| Customization Options | Moderate (kit parameters) | High (choose all materials) | Flexibility vs. simplicity |
| Beginner Failure Rate | Lower (~20-30%) | Higher (~40-60%) | Re-do probability and cost |
Featured Molding Kits: Professional-Grade Options
Clone-A-Pussy® Silicone Refill Kit (Hot Pink)
For experienced molders ready to create additional casts from their original mold or those who already own the molding tray. This refill kit provides everything needed for the casting stage with professional-grade platinum-cure silicone.
- Body-safe platinum-cure silicone rated for intimate use—non-porous and hypoallergenic
- Hot pink vibrant color pre-mixed for convenience—no color matching guesswork
- Professional-grade formula used in adult product manufacturing
- Complete refill package includes measured silicone components and detailed instructions
- Reusable mold compatible works with existing Clone-A-Pussy molds
- 4-6 hour cure time for handling, 24 hours for full cure and use
- Durable finished product lasts 2-5 years with proper care
Perfect for: Creating multiple casts from one mold session, replacing worn casts, or upgrading from plaster to functional silicone. Requires existing molding tray and mold.
Care Requirements: Clean with mild soap and water or dedicated toy cleaners. Use only water-based lubricants if using cast intimately—silicone lubes damage silicone products.
View Silicone Refill Kit →Clone-A-Pussy® Plus + Sleeve Kit (Complete System)
The ultimate all-in-one intimate molding system for first-timers and experienced users. This complete kit includes everything needed for both molding and casting stages, plus a premium silicone sleeve for enhanced functionality.
- Complete molding system includes molding tray, alginate molding powder, mixing tools, and detailed instructions
- Premium silicone sleeve included transforms your cast into a functional stroker with realistic texture
- Body-safe alginate formula captures exceptional surface detail safely—hypoallergenic for most users
- Fast 2-4 minute set time reduces discomfort and position-holding fatigue
- Professional molding tray ensures proper shape and positioning during molding process
- Platinum-cure silicone casting material for durable, body-safe finished product
- Step-by-step photo instructions guide you through every stage with timing clarity
- Customer support access for troubleshooting and questions throughout process
Perfect for: First-time molders, those wanting a functional finished product, or users upgrading from basic display-only kits. Everything included—no additional purchases necessary.
Process time: Active work 1.5-2 hours, plus 24-hour curing. Plan for uninterrupted privacy during molding stage.
Maintenance: Clean cast with body-safe toy cleaners and store in cool, dry location. Detailed care instructions included. For comprehensive cleaning protocols, see our complete cleaning guide.
View Complete Kit System →Materials & Safety: Body-Safe Basics
Using the wrong materials for intimate molding can cause chemical burns, allergic reactions, or long-term skin damage. This isn't DIY furniture—it's body contact.
Molding Materials (Stage One)
Skin-safe alginate: Derived from seaweed, dental-grade alginate is the safest choice for beginners. Sets quickly (2-4 minutes), captures exceptional detail, hypoallergenic for most people, and affordable ($15-25 per pound). Single-use only—molds shrink and degrade as water evaporates.
Platinum-cure silicone: Medical-grade silicone safe for prolonged skin contact. Longer working time (15-30 minutes) reduces rush errors. Creates reusable molds. Requires precise 1:1 mixing by weight. Costs $40-80 per pound. Sensitive to contamination—contact with sulfur, latex, or certain clays prevents curing (called "inhibition").
What to avoid: Tin-cure silicones (may cause skin sensitivity), craft plasters (not formulated for skin contact), unknown or unlabeled materials, and any product without clear safety data sheets.
Casting Materials (Stage Two)
Plaster/gypsum: Inexpensive ($5-15), easy to mix, sets hard. Good for display pieces only—too brittle and porous for use. Can be painted with acrylics for display. Generates mild heat during curing (exothermic reaction).
Platinum-cure silicone: Durable, flexible, body-safe when fully cured. Expensive ($50-100 per pound) but creates functional casts. Shore A hardness options (softer feels more realistic). Cures slowly (4-24 hours depending on hardness). Browse realistic masturbators to see professional silicone manufacturing quality for comparison.
Urethane resins: Some specialty urethanes create skin-safe casts but require complete curing and may need post-cure washing. Verify manufacturer specifications explicitly state body-safe after full cure. Not all urethanes are safe for skin contact.
Critical Safety Protocols
⚠️ Non-Negotiable Safety Requirements
- Patch test 24 hours before: Apply small amount of molding material to inner forearm. Wait 24 hours. Check for redness, itching, swelling, or rash. Any reaction = do not proceed
- Hair management: Trim (never wax immediately before—wait 24-48 hours after waxing). Alginate bonds to hair and pulls painfully during removal
- Barrier creams: Use kit-provided release agents or water-based lubricant where directed. Never use oil-based products with silicone—causes inhibition
- Time-on-skin limits: Follow manufacturer maximums strictly. Alginate: 10 minutes max. Silicone: 30 minutes max. Extended contact increases irritation risk
- Broken skin exclusion: No molding on cuts, abrasions, rashes, infections, recent waxing, or active skin conditions
- Stop for discomfort: Burning, stinging, excessive heat, or pain means immediate removal—don't wait for timer
Lube and Release Agents
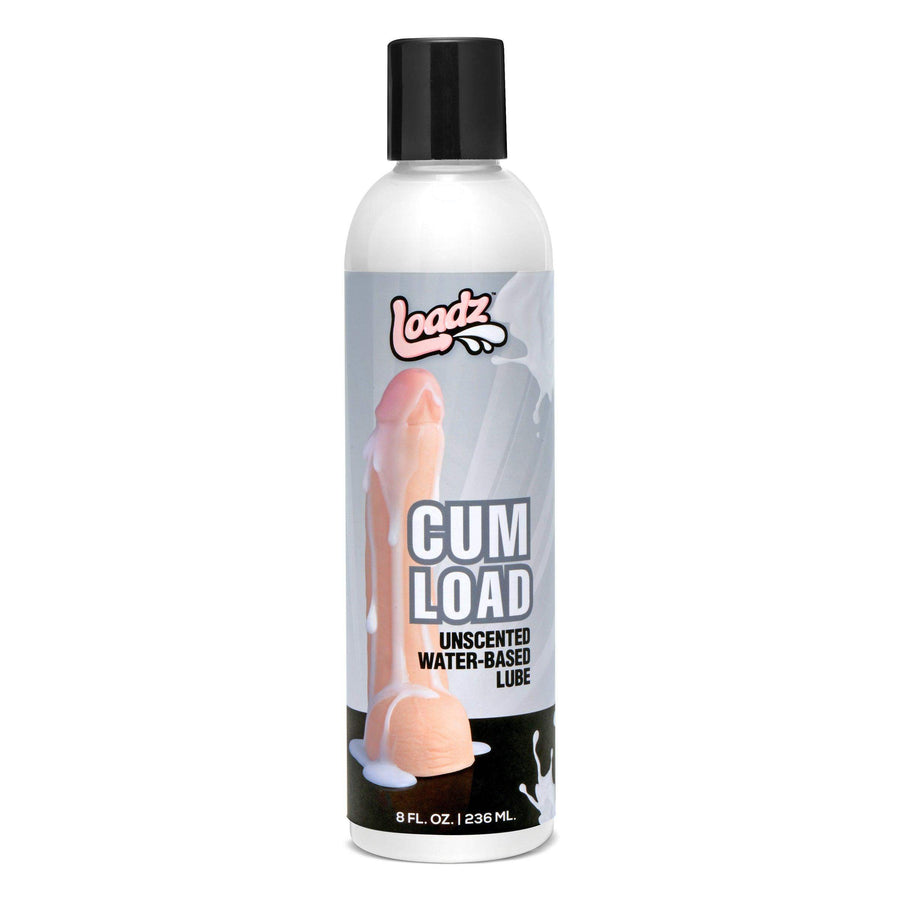
For alginate molds: Light application of water-based lubricant helps removal and protects skin. Avoid excessive amounts that create gaps in detail capture. Stock quality options from our water-based lubricants collection. For comprehensive lube guidance, see our complete lube compatibility guide.
For silicone molds: Use only kit-provided release agents or products explicitly safe for platinum-cure silicone. Oil-based lubes prevent proper curing.
Ventilation and Workspace
Work in well-ventilated areas. While alginate is virtually odorless, silicone materials may emit mild odors during mixing. Urethane resins can produce stronger fumes requiring open windows or fans. Never work in completely enclosed spaces without airflow.
Accuracy & Feel — What Affects the Result
Detail Retention Factors
Mix ratio precision: Alginate requires exact water temperature and powder-to-water ratio. Too much water = weak mold that tears. Too little = grainy texture that misses details. Silicone demands precise 1:1 mixing by weight—volumetric measuring introduces errors. Use digital scale accurate to 1 gram.
Temperature control: Ideal working temperature: 70-75°F (21-24°C) for both room and materials. Warmer speeds curing (reduces working time, may cause premature setting). Colder slows curing (may prevent complete setting). Use thermometer to verify water temperature for alginate mixing.
Mixing technique: Stir steadily without whipping air. Vigorous beating creates thousands of tiny bubbles that appear as surface pits in final cast. Mix just until uniform—over-mixing introduces air without improving blend.
Posture and support: Holding position perfectly still for 2-5 minutes is harder than it sounds. Use cushions, supports, or fixtures to maintain position comfortably. Movement during setting creates blurred details or distortions.
Demold timing: Remove too early = mold tears or collapses. Too late = alginate begins shrinking or silicone becomes difficult to separate. Follow kit timing exactly—set phone timer and don't guess.
Color Realism
Skin-safe pigments only: Use pigments specifically formulated for your casting material. Silicone pigments for silicone casts, never craft paints or food coloring. These aren't body-safe and can cause reactions if cast is used intimately.
Undertones matter: Skin has warm (yellow/red) or cool (pink/blue) undertones. Most people underestimate the complexity of matching skin tone. Some kits include multiple pigment options for better matching.
Testing first: Mix small test batch with pigment before committing to full cast. Color appears different wet versus cured. What looks right when liquid may dry significantly darker or lighter.
Shrinkage and Expansion
Alginate shrinkage: Begins immediately after demolding. Loses 2-5% size within 6-12 hours as water evaporates. Must cast immediately after creating mold.
Silicone minimal change: Platinum-cure silicone shrinks less than 1% during curing. Dimensionally stable over time.
Plaster expansion: Gypsum plasters expand slightly (1-2%) during curing, potentially creating tighter fit in mold. Not an issue for display casts.
Setting Realistic Expectations
"Inspired by" vs. exact: Even professional casting achieves 90-95% accuracy at best. Expect minor imperfections—small bubbles, slight size variance, texture variations. Perfect replication is impossible with available materials and techniques.
Photography exaggeration: Macro photography and dramatic lighting make details appear more pronounced than they are in hand. The cast will be realistic but won't look exactly like professional product photos you see in our pornstar masturbators collection, which use industrial-grade equipment.
First attempt success rate: With kits: 70-80% create usable casts on first try. With DIY: 40-60% success rate for first-timers. Plan for potential second attempt—have extra materials or budget for additional kit.
Step-by-Step: How a Kit Typically Works
This educational overview shows the standard kit process. Always follow your specific kit's instructions—manufacturers optimize for their materials. For additional usage insights, see our comprehensive usage guide.
Preparation (10-20 minutes)
- Protect workspace: Lay towels or plastic tarp. Molding materials stain fabric and are difficult to remove from carpet
- Organize materials: Open kit, verify all components present, arrange in order of use
- Set timer: Use phone or kitchen timer—don't rely on guessing time
- Measure water temperature: 70-75°F (21-24°C) for alginate. Use thermometer
- Position supports: Cushions, rolled towels, or fixtures to help maintain comfortable position
- Confirm consent: Explicit, enthusiastic agreement from person being molded. Discuss boundaries, safe words, stop signals
Patch Test (24 Hours Prior)
Critical safety step: Mix small amount of molding material per kit instructions. Apply dime-sized portion to inner forearm. Leave on for the same duration you'll use for intimate molding (typically 2-5 minutes). Rinse off. Wait 24 hours and check for any redness, itching, or irritation. Even mild reaction means do not proceed with intimate molding.
Molding Stage (5-10 minutes)
- Apply release agent: Kit-provided barrier cream or thin layer of water-based lube as directed
- Mix molding material: Follow ratio exactly. Stir quickly but smoothly—no whipping. Typical working time: 2-4 minutes after mixing starts
- Position and apply: Get into comfortable, sustainable position. Pour or pack mixed material around anatomy per kit design
- Hold still: Absolutely critical—any movement creates distortions. Focus on breathing steadily. Use timer—don't guess when set
- Demold gently: At exact timing, slowly separate mold from skin. Gentle, steady pressure—don't rush or force
- Rinse skin immediately: Lukewarm water, mild soap, pat dry. Check for any irritation
💡 Movement Prevention Tips
Involuntary movements ruin molds. Strategies: breathe steadily and shallowly (deep breaths move everything), secure comfortable support (won't need to adjust mid-mold), have partner assist with stabilization if doing solo molding, distraction helps—play calming music or podcast, focus on timer countdown rather than physical sensation.
Casting Stage (15 minutes active, 4-24 hours curing)
- Inspect mold: Check for tears, voids, or major imperfections. Small bubbles are normal; large gaps mean start over
- Mix casting material: Follow kit instructions precisely. Plaster requires gradual powder-into-water stirring. Silicone requires accurate weighing and thorough mixing
- Pour into mold: Slow, steady pour from one spot—let material flow naturally to edges. Pouring too fast traps air
- De-bubble: Tap mold gently on table 20-30 times. Bubbles rise to surface. Some use vibration tools for better results
- Cure completely: Follow manufacturer timing exactly. Don't rush—incomplete cure affects durability and may leave residual chemicals that cause skin sensitivity
Finishing (15-30 minutes)
- Demold cast: Once fully cured, carefully separate cast from mold. Alginate molds tear during removal (expected). Silicone molds can be peeled away and saved
- Rinse cast: Wash thoroughly with mild soap and water to remove any mold residue. Use quality toy cleaners for thorough sanitization
- Trim flash: Remove excess material (flash) at edges using sharp craft knife or scissors. Sand rough edges smooth with fine-grit sandpaper
- Optional coloring: Apply skin-safe pigments if not pre-colored. Follow pigment manufacturer instructions for application and sealing
- Final cure/wash: Some materials benefit from additional curing time or final wash before storage or use
Step-by-Step: DIY Path (For Experienced Makers)
Important caveat: DIY intimate molding requires experience with casting materials, understanding of safety protocols, and comfort troubleshooting problems. This is not recommended for first-time molders.
Sourcing Materials
Reputable suppliers only: Purchase from established special effects, dental, or medical supply companies. Avoid unmarked or generic materials. Request Safety Data Sheets (SDS) and verify skin-safe certifications.
Alginate specifications: Dental or life-casting grade (not craft grade). Fast-set formulations (2-4 minute working time). Check expiration dates—old alginate won't set properly.
Silicone specifications: Platinum-cure (not tin-cure). Shore A hardness appropriate for your needs (00-20A for soft/realistic). 1:1 mix ratio by weight simplifies measuring. Verify "skin-safe" or "body-safe" explicit labeling.
Essential Tools
- Digital scale: 0.1-gram precision, 1000g+ capacity ($20-30)
- Thermometer: Instant-read, measures 60-90°F accurately ($10-15)
- Stopwatch/timer: Critical for short working times
- Mixing containers: Food-safe plastic or silicone (avoid paper cups that absorb moisture)
- Spatulas/stirrers: Silicone or plastic, multiple sizes
- Measuring cups: For water measurement in alginate mixing
Mixing Ratios & Timing
Alginate powder-to-water ratio: Typically 1:1 by volume or follow manufacturer specifications exactly. Water temperature dramatically affects working time—warmer water (75-80°F / 24-27°C) = faster set, cooler water (65-70°F / 18-21°C) = longer working time.
Silicone Part A + Part B: Weigh precisely on digital scale. 1:1 ratios mean exactly equal weights. Even 5% deviation can prevent proper curing or change material properties.
Test batches first: Before attempting intimate mold, practice on a non-intimate object (hand, arm). Verify working time, test demold process, confirm proper curing.
Fixture and Support Setup
Container selection: Food-safe cylinders, cups, or custom-built forms. Size appropriately—too large wastes material, too small creates pressure and discomfort.
Positioning aids: Foam wedges, rolled towels, adjustable supports. Goal: maintain exact position comfortably for full working + setting time. For positioning inspiration, see our hands-free positioning guide.
Angle considerations: Positioning affects detail capture and demold ease. Consult casting references for optimal angles.
Common DIY Pitfalls
- Inhibition: Silicone won't cure if it contacts sulfur-containing materials (latex gloves, certain clays, sulfur-based soaps), oils, or some plastics. Use nitrile gloves only, verify all contact materials are silicone-safe
- Temperature errors: Too-warm water races the clock and may burn skin. Too-cold prevents complete curing
- Trapped air: Major issue in DIY without proper de-airing techniques. Bubbles create surface defects
- Posture fatigue: Underestimating how difficult holding still is. Results: movement blur, incomplete molds
- Ratio mistakes: "Close enough" doesn't work—precise measurement is critical
Budget, Time & Mess: Plan Before You Pour
Cost Breakdown
Typical kit cost: $40-80 all-inclusive (molding material, casting material, container, instructions, sometimes release agent). Everything needed in correct quantities.
DIY material cost: Alginate $15-25/lb (need 1-2 lbs), platinum silicone $50-100/lb (need 1-2 lbs for mold + cast), containers $5-10, release agents $10-15. Total materials: $80-150 for equivalent result.
DIY tool cost (first-time): Scale $25, thermometer $15, mixing containers $10, spatulas $10, measuring cups $5. Total one-time investment: $65. Subsequent projects only need materials.
Hidden costs: Failed attempts require complete material replacement. Kit failure = $50-80 re-purchase. DIY failure = $30-50 in wasted materials but you still have tools.
Cost effectiveness: Kits more economical for 1-3 attempts. DIY becomes cheaper if making 4+ casts and you don't mind learning curve failures.
Time Investment
Active work time: 1.5-2 hours (preparation, molding, casting, initial cleanup). Curing time is passive but requires waiting 4-24 hours before handling.
Cleanup time: 30-45 minutes for thorough cleanup, disposal, and workspace restoration.
Total project time: Plan for half a day (active work in 2-3 hours, then waiting for cure).
Cleanup Planning
- Disposable supplies: Garbage bags, paper towels, disposable cups, vinyl/nitrile gloves
- Protective wear: Old clothes or apron—staining is likely
- Sink proximity: Need running water nearby for rinsing tools and materials
- Waste disposal: Cured materials go in trash. Never pour liquid materials down drains—they harden and cause plumbing issues
- Strainer protection: Use sink strainer to catch material bits during cleanup
Privacy Considerations
Uninterrupted time: Lock doors, silence phones, ensure privacy for the 2-4 hours needed. Interruptions mid-process ruin molds.
Consent for documentation: If taking photos or video (for documentation or sharing), explicit consent required. Discuss before starting—never surprise someone mid-process.
Storage and access: Who will see the finished cast? Where will it be stored? These discussions happen before molding, not after. For discreet storage guidance, see our travel and storage guide.
Ethics, Consent & Privacy
These considerations are mandatory, not optional suggestions.
Explicit Consent Requirements
Before starting: The person being molded must give clear, enthusiastic, informed consent. "Informed" means understanding the full process, time commitment, physical sensations, potential discomfort, cleanup requirements, and what happens to the finished cast.
Ongoing consent: Right to stop at any point for any reason without explanation or judgment. Safe words or signals agreed upon beforehand. Stop immediately if requested—materials can be washed off.
Consent for the cast: Discuss before molding: Will the cast be kept private? Shown to others? Used personally? Gifted? Sold? Photographed? These agreements matter and should be respected permanently.
Privacy and Documentation
Photography/video: Never take photos or video without explicit, advance permission. Surprise documentation during vulnerable moments violates trust fundamentally.
Sharing and display: Even if you have permission to create the cast, you don't automatically have permission to show it to others, post online, or discuss publicly. Separate conversations, separate consent.
Storage security: Finished casts should be stored where only authorized people have access. Breaching agreed storage/privacy terms violates the original consent. TheDildoHub maintains strict privacy standards—learn more on our discreet shipping and privacy page.
Health and Safety Boundaries
Medical exclusions: Don't proceed if person has: active skin conditions (eczema, psoriasis flare-ups, infections), recent waxing (within 48 hours), cuts or abrasions in mold area, known allergies to molding materials, recent medical procedures in area.
When to postpone: Person is ill, stressed, under influence of substances, uncertain about consent, or not in appropriate mental/emotional state for the process.
Stop signals: Agree on clear signals before starting. Honor them immediately without questioning or hesitation.
⚠️ Consent Cannot Be Assumed
Being in a relationship, having made casts before, or having discussed it previously doesn't mean automatic consent for this specific instance. Consent is specific, informed, and ongoing—not a blanket permission given once and assumed forever. Always confirm explicitly each time.
Care, Storage & Longevity of Casts
Initial Curing
Complete cure before handling: Even if surface feels set, internal curing continues. Follow manufacturer timing fully. Plaster: 24 hours. Silicone: 24-48 hours for full cure. Handling too early can create permanent indentations or distortions.
Off-gassing periods: Some materials release minor fumes during curing. Store in ventilated area during cure. Silicone typically off-gasses for 24-48 hours post-cure.
Storage Best Practices
Environment: Cool, dry location away from direct sunlight. UV exposure degrades silicone over time. Excessive heat softens materials. Humidity encourages mold growth on porous casts (plaster).
Containers: Breathable cloth bags better than sealed plastic (which traps moisture). Rigid storage boxes protect from crushing if cast will be stored with other items.
Separation from other materials: Store individually. Different materials touching can cause chemical reactions—silicone against certain plastics can degrade both.
Dust protection: Silicone attracts dust. Store in sealed bag or container when not displayed.
Cleaning Finished Casts
Silicone casts: Wash with mild soap and water. Rinse thoroughly. Pat dry—don't air-dry completely as dust settles on damp silicone. Use quality cleaners from TheDildoHub's toy cleaners collection if cast will be used intimately. For comprehensive cleaning protocols, see our complete cleaning guide and stroker maintenance guide.
Plaster casts: Dust only—don't wash (water causes dissolution). Use soft brush or compressed air.
What to avoid: Harsh chemicals, abrasives, alcohol, bleach, or solvents. These damage surfaces and degrade materials.
Longevity Expectations
Plaster display casts: Indefinite if kept dry and protected from impacts. Brittleness means they break easily if dropped.
Silicone functional casts: 2-5 years with proper care and storage. Degradation signs: tackiness, discoloration, tearing, loss of flexibility. When these appear, retire the cast. Compare this to commercially manufactured options in our male masturbators collection, which often last 5-10+ years with premium materials.
Comparing Molding Kits to Ready-Made Alternatives
Before committing to the molding process, consider whether ready-made realistic alternatives might better serve your needs. This isn't about discouraging DIY creativity—it's about making informed decisions.
Professional Manufacturing Advantages
Industrial-grade materials: Commercial manufacturers use platinum-cure silicone formulated for thousands of hours of use, not dozens. Medical-grade TPE compounds go through extensive safety testing. Quality control ensures consistency impossible in home casting.
Advanced texture design: Professional products feature engineered internal textures created through CAD modeling and tested extensively for pleasure response. Home casts capture surface anatomy but lack the sophisticated internal chambers and ridges found in premium products. Explore texture complexity in our complete texture guide.
Durability testing: Commercial products undergo stress testing, temperature cycling, and material fatigue analysis. A $60 premium sleeve may outlast 3-4 home casts, making it cost-competitive long-term.
Warranty and support: Defective commercial products get replaced. Failed home casts mean starting over at your expense.
When DIY Molding Makes Sense
Unique personal connection: The emotional significance of having an exact replica of a partner's anatomy—especially meaningful for long-distance relationships, military deployments, or medical situations affecting intimacy.
Body representation: Creating a cast of your own anatomy for partner use while traveling, or for transgender individuals wanting toys matching their anatomy.
Creative expression: Interest in the molding process itself as craft/art, not just the finished product.
Very specific anatomy matching: Commercial sizes don't accommodate your measurements, and custom manufacturing isn't available.
When Ready-Made Is Better
First-time users: Uncertain about texture preferences, tightness levels, or even whether you'll enjoy this category of toy. Browse our complete buying guide to understand available options before committing to molding.
Convenience priority: Want immediate use without 2-day project commitment and curing time.
Limited privacy: Home molding requires uninterrupted hours. Commercial products ship discreetly and arrive ready to use.
Budget consciousness: When factoring in potential failed attempts, tools, and time value, a $60-80 premium commercial product may be more economical than $40 kit + $30 re-do + tool costs.
Safety concerns: Uncomfortable with chemical mixing, patch testing, and medical considerations inherent to DIY. Commercial products arrive pre-tested and certified body-safe.
Hybrid Approach: Test First, Mold Later
Smart strategy: Purchase a commercial realistic sleeve first. Use it to understand:
- What tightness level you prefer (helps calibrate mold sizing)
- Texture intensity that works for you (informs whether smooth or detailed cast is better)
- Maintenance tolerance (molded casts require similar or more care)
- Whether this toy category suits your needs at all
Then, if you're certain about wanting a personalized version, proceed with molding—armed with understanding of your preferences. Explore starter options in our pocket pussies collection.
Advanced Troubleshooting Guide
When problems occur, quick identification and response can sometimes salvage a cast—or at minimum, teach you what to do differently next time.
Molding Stage Issues
Alginate sets too fast: Water was too warm, or working time exceeded. Solution for next attempt: Use cooler water (65-70°F), work more quickly, have all materials pre-positioned.
Alginate doesn't set: Expired alginate powder, insufficient water, or contaminated mixing container. Verify expiration date before starting. Use fresh, clean water and containers.
Mold tears during removal: Too thin in spots (insufficient material), pulled too quickly, or demolded before fully set. Apply thicker layer of alginate, wait full recommended time, remove very slowly.
Detail loss in mold: Air bubbles trapped against skin, movement during setting, or release agent too thick. Apply release agent thinly, hold absolutely still, consider pre-coating skin and allowing excess to drip off.
Casting Stage Issues
Silicone won't cure (stays tacky): Contamination from sulfur, oils, or incorrect mixing ratio. Verify Part A and Part B measured exactly equal by weight. Ensure all contact materials are platinum-silicone-safe. If contaminated, mold cannot be saved—must start over.
Plaster overheats: Too much plaster in mix creates excessive exothermic reaction. Follow manufacturer ratios strictly. Mix smaller batches if needed. Keep mold in cooler environment during curing.
Surface bubbles everywhere: Mixing introduced too much air, or mold wasn't tapped adequately. Mix slowly and deliberately, tap mold on table 30-40 times after pouring, consider using vibration tool.
Cast won't release from mold: Insufficient release agent, or premature demolding attempt. Wait full cure time plus buffer (add 2-4 hours to manufacturer recommendation). Never force—can damage both mold and cast.
Finished Cast Problems
Silicone feels greasy/oily: Incomplete cure or plasticizer migration from contamination. Allow additional cure time (another 24-48 hours). If persists, material was contaminated—not safe for use.
Cast has soft spots: Uneven mixing created areas of wrong ratio. Entire cast may be compromised—structural weak points can tear during use. Scrapping and redoing is safer than risking injury.
Color streaking or marbling: Pigment not mixed thoroughly. While cosmetic issue doesn't affect function, it indicates mixing technique needs improvement for next attempt.
Cast develops odor: Bacteria growth in porous materials (plaster) or incomplete cure leaving residual compounds. Silicone should not develop odor—if it does, wasn't fully cured. Discard and start fresh.
Material Science Deep Dive
Understanding the chemistry helps you make better decisions and troubleshoot effectively.
Why Alginate Works for Molding
Chemical composition: Alginate is derived from brown seaweed (alginic acid), typically used with calcium sulfate as catalyst. When mixed with water, calcium ions cross-link the alginate chains, creating a hydrogel that captures microscopic details.
Setting mechanism: The reaction is irreversible and time-dependent. Once alginate begins setting, you cannot reverse or slow it by adding water or heat. This is why timing is critical.
Shrinkage cause: Alginate is 85-90% water by weight. As water evaporates, the hydrogel structure collapses proportionally. This is unavoidable physics—not a product defect.
Temperature sensitivity: Warmer water accelerates calcium ion mobility, speeding cross-linking. Every 5°F increase roughly halves working time. Precision thermometry isn't optional—it's essential.
Platinum vs Tin-Cure Silicone
Platinum-cure (addition-cure): Uses platinum catalyst to cross-link silicone chains. Creates stable, body-safe material with minimal shrinkage (<1%). Does not produce cure byproducts. Inhibited by sulfur, nitrogen compounds, and some plastics. More expensive but safer for skin contact. This is what premium manufacturers use—browse realistic masturbators to see professional platinum-silicone products.
Tin-cure (condensation-cure): Uses tin catalyst and produces alcohol byproduct during curing. Shrinks more (3-5%), smells stronger, may cause skin sensitivity. Cheaper but not recommended for intimate molding. Not body-safe for prolonged skin contact.
Why contamination matters: Sulfur-containing compounds poison the platinum catalyst permanently. Even tiny amounts (latex glove residue, certain soaps) prevent curing. The mold becomes unusable—cannot be "fixed."
Shore Hardness Explained
Measurement system: Shore A scale measures softness/hardness of elastomers. 00-scale (very soft) to 100 (hard rubber). Most intimate toys: Shore A 00-20 (very soft, realistic), or Shore A 20-40 (firmer, more durable).
Feel implications: Lower Shore = more realistic but tears easier, attracts dust, requires more care. Higher Shore = more durable, stays cleaner, feels less realistic. Choose based on priority: realism vs longevity.
Cure time relationship: Softer silicones (lower Shore A) typically cure slower—may need 48+ hours. Harder formulations cure in 4-8 hours. Rushing cure creates weak internal structure.
Long-Term Maintenance Protocols
Proper ongoing care extends cast lifespan significantly and maintains hygiene for functional use.
Monthly Deep Cleaning (For Used Casts)
- Inspect for damage: Check for tears, discoloration, tackiness, or structural changes. Address issues immediately or retire cast
- Deep wash: Soak in warm water with mild soap for 10-15 minutes. Use soft brush to clean surface texture thoroughly
- Sanitize: Use toy cleaner rated for silicone if cast is used intimately. Rinse thoroughly—soap residue degrades silicone over time
- Complete drying: Air-dry for 2-4 hours until no moisture remains. Silicone dries slowly—rushing this creates mildew risk
- Dust protection: Once dry, store in clean cloth bag or closed container
Quarterly Maintenance Checks
Material integrity assessment: Gently flex cast to check for weak spots or micro-tears. Surface should return to shape immediately without permanent creasing.
Odor check: Properly maintained silicone should be odorless. Any smell indicates bacterial growth or material breakdown—both mean replacement time.
Storage condition review: Verify storage location remains cool, dry, and dark. Check for any contact with incompatible materials that could cause degradation.
When to Retire a Cast
Immediate replacement signals:
- Visible tears or cracks (bacteria harbor in damaged areas)
- Persistent tackiness even after washing (material breakdown)
- Strong odor that doesn't wash away (bacterial colonization)
- Discoloration that spreads (UV damage or material degradation)
- Loss of flexibility/becomes brittle (end of material lifespan)
Safe disposal: Silicone casts can be discarded in regular trash once cut into small pieces (privacy consideration). Check local regulations for special disposal requirements in your area.
Enhanced Safety Protocols for Sensitive Users
Some individuals require extra precautions due to sensitive skin, allergies, or medical conditions.
Allergy-Prone Individuals
Extended patch testing: Perform patch test 48-72 hours before molding instead of standard 24 hours. Test on two different locations (inner forearm and inner thigh) to verify consistency.
Hypoallergenic materials only: Choose medical-grade alginate specifically labeled hypoallergenic. Avoid kits with added fragrances or colorants—these increase reaction risk.
Consultation: If you have history of contact dermatitis or material allergies, consult dermatologist before proceeding with intimate molding.
Compromised Skin Conditions
Healing time requirements: After waxing: wait minimum 72 hours. After shaving: wait 24 hours. After medical procedures: follow doctor's clearance timeline plus 1 week buffer.
Active condition postponement: Never mold during eczema flare-ups, psoriasis outbreaks, active infections, or while using topical medications. Wait until skin fully returns to normal baseline.
Temperature Sensitivity
Material temperature testing: Before applying to intimate anatomy, test mixed material on less sensitive area (back of hand). Should feel neutral to slightly cool—never warm or hot.
Environmental control: Work in temperature-controlled room (68-72°F / 20-22°C). Avoid molding in very hot or cold environments that affect material behavior and comfort.
Decision Flow — Which Path Fits You?
Choose a Kit If You:
- Are a first-timer with no casting experience—kits reduce variables and provide safety nets
- Value predictable outcomes over customization—pre-tested formulations deliver consistent results
- Want minimal stress and planning—everything included, instructions clear, less decision fatigue
- Prioritize safety—verified skin-safe materials remove research burden
- Don't own tools—buying tools separately costs more than kit savings
- Making 1-2 casts only—kit cost is justified for limited use
- Want customer support—manufacturers provide troubleshooting help
Consider DIY If You:
- Have casting experience—comfortable with materials, ratios, troubleshooting
- Own precision tools—scale, thermometer, proper containers already available
- Plan multiple casts—tool investment amortizes across 4+ projects
- Want specific materials—particular silicone hardness, colors, or properties not in standard kits
- Comfortable with trial/error—won't be discouraged by initial failures
- Can source materials locally—access to specialty suppliers reduces shipping costs
- Enjoy the learning process—value the skill development over guaranteed first-time success
Consider Ready-Made Alternatives If You:
- Want immediate use without multi-day project commitment
- Prioritize convenience and reliability over personalization
- Are exploring this toy category for the first time—test before investing in molding
- Have limited privacy for extended molding sessions
- Value warranty protection and replacement options for defective products
- Prefer professional texture design engineered for optimal pleasure response
- Want longest possible product lifespan—premium commercial products outlast home casts
Browse professionally manufactured options: male masturbators, pocket pussies, realistic designs, and licensed pornstar molds.
Hybrid Approach:
Use a kit but add professional tools for reliability and future flexibility:
- Purchase complete kit for safety and simplicity
- Add digital scale for precise measurement verification
- Add thermometer for optimal temperature control
- Follow kit instructions but use tools to ensure precision
- Gain experience safely before attempting fully DIY projects
This approach reduces first-attempt failure risk while building skills for future independence.
Frequently Asked Questions
Ready to Choose Between DIY and a Kit?
Explore intimate molding options with TheDildoHub guidance—whether you choose kits for simplicity or carefully research DIY methods, prioritize safety and informed decisions.
Featured Molding Kits:
🎨 Clone-A-Pussy® Silicone Refill Kit — Professional platinum-cure silicone for additional casts
🎁 Clone-A-Pussy® Plus + Sleeve Kit — Complete system with premium silicone sleeve included
Or explore ready-made realistic alternatives:
🛍️ Pocket Pussies and Male Masturbators with professional texture design
🎭 Pornstar Masturbators featuring licensed celebrity molds
🔌 Vibrating Options and Dual-Density Designs
💪 Love Dolls and Torso Masturbators for full-body realism
✅ Discreet shipping from California in plain, unmarked packaging
💳 Discreet billing appears neutral on statements—details on our shipping and privacy page
🎁 Free sexy gift with every order as our thank-you
💬 Friendly, judgment-free support for product guidance
📦 Quick handling and reliable US delivery from our California warehouse
⭐ 4.8/5 stars on Trustpilot—read real reviews at our Trustpilot page
Essential care supplies: Water-based lubricants and toy cleaners for proper maintenance of casts or commercial products.
Whether DIY, kit, or ready-made—informed choices lead to satisfying results.










Leave a comment